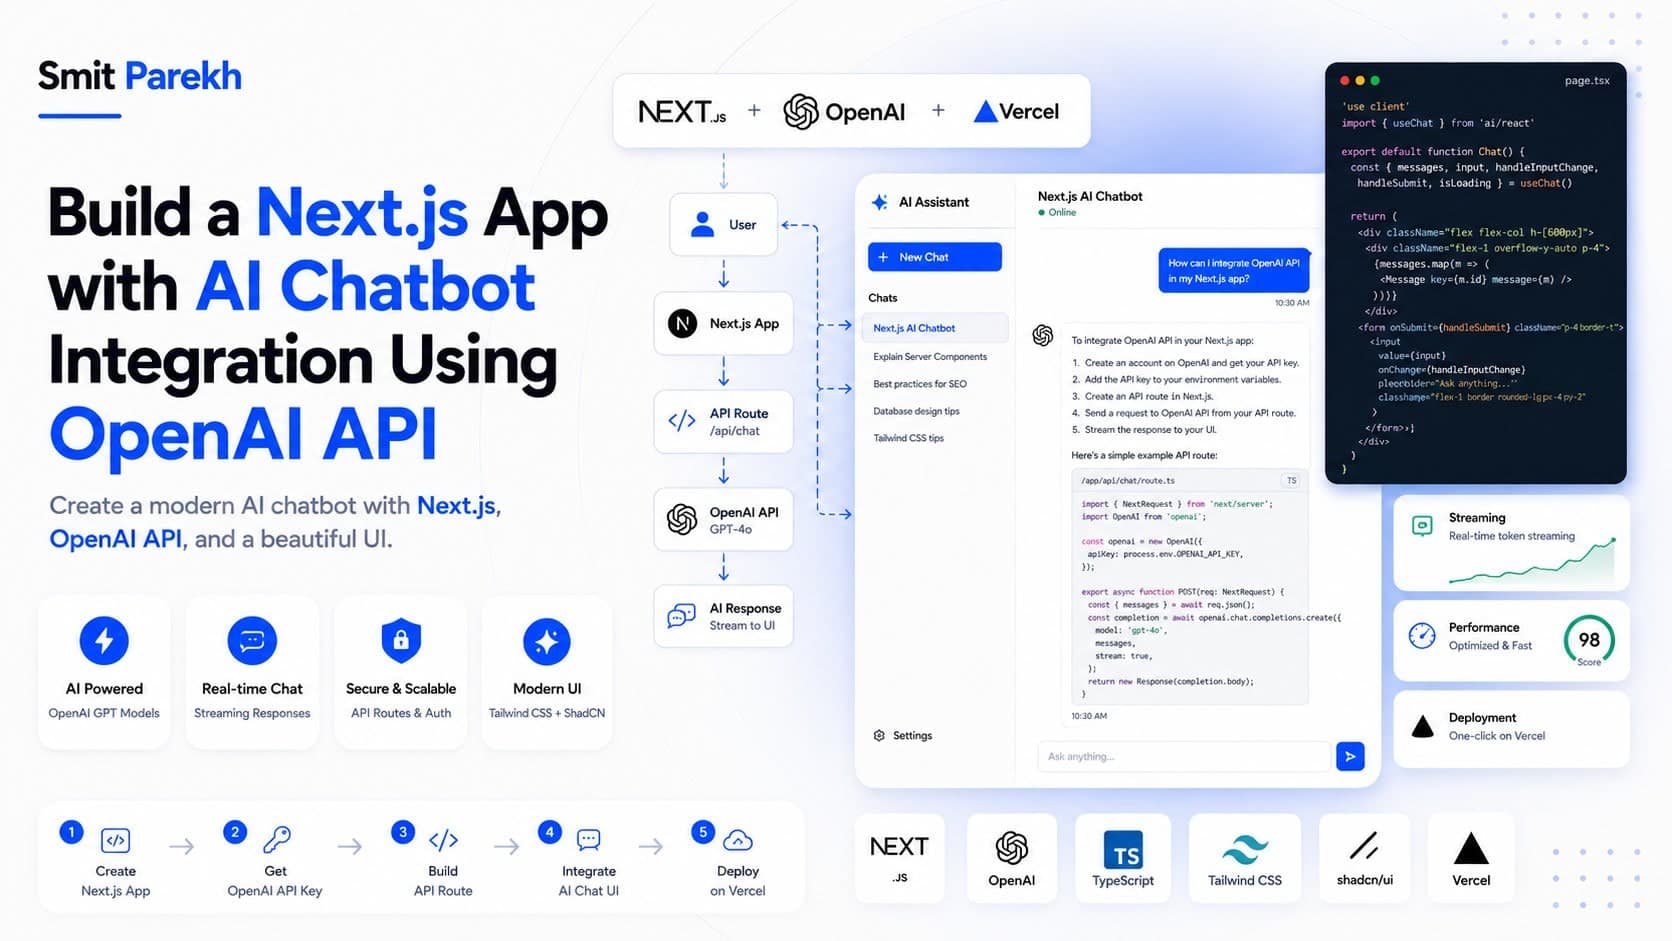
Integrating an AI chatbot into your Next.js application can transform user experience, offering dynamic and interactive capabilities. This guide will walk you through the essential steps to build a Next.js app with AI chatbot integration using the OpenAI API, focusing on practical implementation and best practices.
TL;DR
- Next.js + OpenAI API: Build interactive AI chatbots with real-time streaming.
- Serverless Functions: Use Next.js API routes for secure API key handling.
- Streaming Responses: Enhance UX with
fetchandResponse.body.getReader(). - Error Handling: Implement robust client-side and server-side error management.
- Scalability: Consider rate limits, context window, and cost implications for production.
Setting Up Your Next.js Project
First, let's get a basic Next.js project up and running. If you already have one, you can skip this section.
npx create-next-app@latest nextjs-ai-chatbot --typescript --eslint
cd nextjs-ai-chatbot
npm install openai
We'll be using the openai SDK for Node.js, which simplifies interactions with the OpenAI API. You'll also need an OpenAI API key. Sign up on the OpenAI platform and generate a new secret key. Keep this key secure – never expose it client-side.
Create a .env.local file in your project root:
OPENAI_API_KEY=sk-your-openai-api-key-here
Building the API Route for OpenAI Interaction
Security is paramount when dealing with API keys. We'll use a Next.js API route to proxy requests to OpenAI. This prevents your API key from ever being exposed to the client-side browser.
Create pages/api/chat.ts:
import { NextApiRequest, NextApiResponse } from 'next';
import OpenAI from 'openai';

const openai = new OpenAI({
  apiKey: process.env.OPENAI_API_KEY,
});

export const config = {
  runtime: 'nodejs',
};

export default async function handler(req: NextApiRequest, res: NextApiResponse) {
  if (req.method !== 'POST') {
    return res.status(405).json({ message: 'Method Not Allowed' });
  }

  const { messages } = req.body;

  if (!messages) {
    return res.status(400).json({ message: 'Messages array is required' });
  }

  try {
    const completion = await openai.chat.completions.create({
      model: 'gpt-3.5-turbo',
      messages: messages,
      stream: true, // Enable streaming
    });

    res.setHeader('Content-Type', 'text/event-stream');
    res.setHeader('Cache-Control', 'no-cache, no-transform');
    res.setHeader('Connection', 'keep-alive');
    res.status(200);

    for await (const chunk of completion) {
      if (chunk.choices[0].delta.content) {
        res.write(chunk.choices[0].delta.content);
      }
    }
    res.end();

  } catch (error) {
    console.error('OpenAI API error:', error);
    if (error instanceof OpenAI.APIError) {
      res.status(error.status || 500).json({ message: error.message });
    } else {
      res.status(500).json({ message: 'An unexpected error occurred.' });
    }
  }
}
This API route handles POST requests, takes a messages array, and streams the response from OpenAI directly to the client. Using stream: true is crucial for a real-time chat experience, as it allows parts of the response to be sent as they are generated, rather than waiting for the entire response.
Designing the Frontend Chat Interface
Now, let's create a simple React component for our chat interface. We'll manage the chat history in state and send messages to our API route.
Update pages/index.tsx:
import React, { useState, FormEvent } from 'react';

interface Message {
  role: 'user' | 'assistant';
  content: string;
}

export default function Home() {
  const [messages, setMessages] = useState<Message[]>([
    { role: 'assistant', content: 'Hello! How can I help you today?' },
  ]);
  const [input, setInput] = useState('');
  const [loading, setLoading] = useState(false);

  const handleSubmit = async (e: FormEvent) => {
    e.preventDefault();
    if (!input.trim() || loading) return;

    const userMessage: Message = { role: 'user', content: input };
    const newMessages = [...messages, userMessage];
    setMessages(newMessages);
    setInput('');
    setLoading(true);

    try {
      const response = await fetch('/api/chat', {
        method: 'POST',
        headers: { 'Content-Type': 'application/json' },
        body: JSON.stringify({ messages: newMessages }),
      });

      if (!response.ok) {
        const errorData = await response.json();
        throw new Error(errorData.message || 'API request failed');
      }

      const reader = response.body?.getReader();
      if (!reader) throw new Error('Failed to get reader from response body.');

      let assistantResponseContent = '';
      const decoder = new TextDecoder();
      while (true) {
        const { done, value } = await reader.read();
        if (done) break;
        const chunk = decoder.decode(value, { stream: true });
        assistantResponseContent += chunk;
        // Update UI progressively
        setMessages((prev) => {
          const lastMessage = prev[prev.length - 1];
          if (lastMessage && lastMessage.role === 'assistant') {
            return prev.map((msg, i) =>
              i === prev.length - 1 ? { ...msg, content: assistantResponseContent } : msg
            );
          } else {
            return [...prev, { role: 'assistant', content: assistantResponseContent }];
          }
        });
      }
    } catch (error: any) {
      console.error('Chat error:', error);
      setMessages((prev) => [
        ...prev,
        { role: 'assistant', content: `Error: ${error.message || 'Something went wrong.'}` },
      ]);
    } finally {
      setLoading(false);
    }
  };

  return (
    <div style={{ maxWidth: '600px', margin: '2rem auto', border: '1px solid #ccc', borderRadius: '8px', padding: '1rem' }}>
      <h1 style={{ textAlign: 'center' }}>AI Chatbot</h1>
      <div style={{ height: '400px', overflowY: 'scroll', border: '1px solid #eee', padding: '0.5rem', marginBottom: '1rem' }}>
        {messages.map((msg, index) => (
          <div key={index} style={{ marginBottom: '0.5rem', textAlign: msg.role === 'user' ? 'right' : 'left' }}>
            <span style={{
              background: msg.role === 'user' ? '#e6f7ff' : '#f0f0f0',
              padding: '0.8rem',
              borderRadius: '12px',
              display: 'inline-block',
              maxWidth: '80%'
            }}>
              <strong>{msg.role === 'user' ? 'You' : 'Bot'}:</strong> {msg.content}
            </span>
          </div>
        ))}
      </div>
      <form onSubmit={handleSubmit} style={{ display: 'flex' }}>
        <input
          type="text"
          value={input}
          onChange={(e) => setInput(e.target.value)}
          placeholder="Type your message..."
          disabled={loading}
          style={{ flexGrow: 1, padding: '0.8rem', border: '1px solid #ccc', borderRadius: '4px', marginRight: '0.5rem' }}
        />
        <button type="submit" disabled={loading} style={{ padding: '0.8rem 1.2rem', background: '#0070f3', color: 'white', border: 'none', borderRadius: '4px', cursor: 'pointer' }}>
          {loading ? 'Sending...' : 'Send'}
        </button>
      </form>
    </div>
  );
}
This client-side code utilizes fetch to call our API route. The crucial part is how it handles the streamed response using response.body?.getReader() and TextDecoder. This allows the chatbot's response to appear word-by-word, mimicking a real-time conversation and significantly improving user perception. The chat history (the messages array) is sent with each request to maintain context for the AI model, a fundamental aspect of effective AI chatbot integration.
Understanding the Costs and Considerations
Building an AI chatbot with the OpenAI API involves understanding potential costs and architectural considerations:
OpenAI API Pricing
OpenAI's pricing is based on token usage. For instance, the gpt-3.5-turbo model might cost around $0.50 - $1.50 USD / 1M tokens for input and output. More advanced models like gpt-4o are more expensive (e.g., $5.00 USD / 1M input tokens, $15.00 USD / 1M output tokens). For projects in Canada, this might translate to approximately $0.68 - $2.05 CAD / 1M tokens for GPT-3.5-turbo, or £0.40 - £1.20 GBP in the UK, and ₹40 - ₹120 INR in India. Accurately estimating token usage is key to managing your budget.
Context Window Management
The messages array you send represents the conversation history, which consumes tokens. OpenAI models have a limited context window (e.g., 16k tokens for gpt-3.5-turbo-16k). For long conversations, you'll need strategies like summarizing older messages, implementing a sliding window approach, or using vector databases for retrieval augmented generation (RAG) to keep the token count within limits and maintain relevant context without incurring excessive costs.
Rate Limits and Scalability
OpenAI APIs have rate limits (requests per minute, tokens per minute). For a production application, you'll need to monitor these limits and implement retry mechanisms with exponential backoff. If you anticipate high traffic, consider moving your API route to a dedicated serverless function platform (like Vercel Functions or AWS Lambda) for better scaling, or even a dedicated Node.js backend if you need more control and persistent connections. For enterprise-level applications, a robust DevOps strategy for monitoring and scaling these serverless functions becomes crucial.
Enhancing the Chatbot: Next Steps
Once you have the basic integration working, you can explore several enhancements:
- User Authentication: Implement NextAuth.js or a similar solution to authenticate users and personalize chat experiences.
- Message History Persistence: Store chat history in a database (e.g., PostgreSQL, MongoDB) to allow users to resume conversations.
- Input Validation & Moderation: Add server-side validation for user inputs and use OpenAI's moderation API to filter inappropriate content.
- Custom Prompts & Personalities: Experiment with system messages to give your chatbot a specific persona or knowledge base.
- Error Reporting & Analytics: Integrate tools like Sentry or Google Analytics to monitor API errors and user engagement.
FAQ
Q: How do I secure my OpenAI API key in a Next.js application?
A: Always use Next.js API routes (serverless functions) to interact with the OpenAI API. Store your API key in a .env.local file and access it via process.env.OPENAI_API_KEY only in your API routes. This prevents the key from being exposed to the client-side browser.
Q: Why is my chatbot not streaming responses in real-time?
A: Ensure you've set stream: true in your openai.chat.completions.create call on the server-side. On the client-side, you need to use response.body?.getReader() and TextDecoder to process the incoming chunks of data as they arrive, continuously updating your UI.
Q: What is the main cost driver when using the OpenAI API for a chatbot?
A: The primary cost driver is token usage, which includes both input (your prompts and conversation history) and output (the AI's responses). Longer conversations or using more advanced models will consume more tokens and increase costs. Efficient context management is key to cost optimization.
Q: Can I use this approach with other LLM providers like Google Gemini or Anthropic Claude?
A: Yes, the core principle of using a Next.js API route to proxy requests and stream responses remains the same. You would swap out the openai SDK for the respective SDK of your chosen LLM provider and adapt the API call and response parsing accordingly.
Final thoughts
Building an AI chatbot integration into your Next.js application using the OpenAI API offers a robust path to enhance user engagement. From secure API key handling to real-time streaming, the patterns we've explored here provide a solid foundation for dynamic and intelligent web experiences. The key lies in understanding both the technical implementation and the operational considerations like cost management and scalability.
If you're building something similar and want a second pair of senior eyes to ensure it's performant, secure, and ready for production, get in touch. I've helped clients ship complex Next.js and AI integrations, and I'd be happy to discuss your specific needs. You can also check out my portfolio for other full-stack and AI projects.